Showing posts with label holiday. Show all posts

Friday, February 15, 2013

Quick Valentine's Day Art.

I had a couple of other projects planned for Valentine's Day but the days have gone by too quickly. Most of my creating is done on Saturdays. I was at church last Saturday from 8:30 until 5:30 with visitation, decorating for a baby shower and helping with the baby shower (and then clean up). Unfortunately, my poor children had to be there that entire time as well. They enjoyed the visitation - and breakfast prior - and behaved well during the baby shower stint. I had prepared them by having them bring things to do, thankfully.

Here is a banner I made for the shower using my Cricut. It was pretty simple since the Cricut did most of the work. I think it turned out cute!


It has the baby's name - Eli Marcus. My friend is doing the nursery in these colors (blue, green and brown) and also doing a sports theme so I cut out a football and soccer ball to add decoration. The cartridge I used for this was Country Life except for the football and soccer in which I used Life's a Party.

So back to Valentine's Day - I always digress (LOL) - here is a super simple project I made using some of the red patterned fabric I had bought at Hobby Lobby. I bought the smallest amount allowable and spent less than $3. 

As you can probably tell just by looking at this, I cut hearts out of the fabric. I used a white pencil to trace a heart I had cut out of cardstock and used my fabric shears to cut them out. Using textured white cardstock cut to 8x10 as the background, I attached the fabric hearts with glue dots.

Here are some of the projects I had found on Pinterest that inspired me to make this....
via JustMakeStuff
via mondocherry
Lots of inspiration on this mantle via Landee See, Landee Do
I found all of these on Pinterest but I like to get the exact link when I share because I want to give the blogger/creator full credit. There is so much inspiration out there! If there's something you want to learn to do then there's a good chance there's a video or tutorial out there on how to do it.

Hope everyone had a great Valentine's Day!

Saturday, February 9, 2013

Countdown to Valentine's.

If you let it then Pinterest can really intimidate you. If you let it then it'll make you think you are the only one out there who doesn't cut your child's pb&j in a different animal shape every day, that you are the only one who doesn't make your own window treatments for your home and that you are the only one who doesn't make your own all natural cleaners for the home. LOL Really, I think some people go on Pinterest and have similar feelings as those. I know that it's really people who create these things as an outlet while their kids are napping or are at school or who have blogs for businesses and get paid to be creative. They don't all fall into those two categories though.

For me being creative and doing crafty things makes me so happy. I like doing it for myself, and I like doing it for my family. I have had many friends in the years past tell me they are not creative. I have a lot to say about that which I will not get into on this post - maybe some other time when I'm thinking about it again and want to share my thoughts on the subject. ;)

Back to Pinterest and being crafty though - I am enjoying trying new foods and crafting adventures I find on there. You can check out my "completed pins" board to see what I've tried/made and what I think about it in the comments. One thing I had pinned and wanted to do for Valentine's Day involved a countdown to Valentine's starting the first of February. Kids like countdowns! We do an advent calendar every Christmas that is a favorite. I think I may create something eventually for the kids for their birthday for a countdown. Well, on the other hand, I probably don't need to as they start their own countdown at least a month in advance!

Here's the image I had found on Pinterest:
via How Does She?
The problem was that I could NOT find any of these cute little mailboxes. None at Hobby Lobby or Michael's. Those are my only two choices in our area. I did look at Walmart (just in case) too with no luck. So I made do with what I did find and went with it - embossed paper mache boxes.


I tried to play with the embossed parts and the paint. I mixed some browns for the first box trying to get a "chocolate" brown color. After I painted several coats and let it dry, I used a makeup sponge and very little red paint to lightly rub across the embossed area trying to just hit it the high points. As you can see I had a little too much paint on a few places. I also used the red for the top edge of the box lid. 

I used scrapbook paper from my stash to put inside both boxes which I painted first. For the bottom heart box I painted it white first (a couple of coats) and then red (another couple of coats). I used a fine grit sanding block to take off the red to show the white underneath. Both projects went fairly quickly. The paint dried quickly. Probably the slowest part was cutting the paper to fit inside which I adhered with Mod Podge. I also applied a top coat of Mod Podge to help seal the paper.

The kids loved them and that's what counts. ;) They enjoyed seeing each day what "Cupid" was going to leave them. I called myself "Cupid" which they thought was pretty funny. LOL

The boxes did take a little bit of a beating with the constant on and off of the lids. I wish I hadn't put paper inside the inner edges of the lid since it was sort of tight and rubbed some. It would probably do good to put another coat or two of Mod Podge on it.

Things I put inside the boxes included little treats such as packaged muffins, Combos, gum, Mentos, Hershey kisses & hugs, etc. Yes, mostly junk food which meant that "Cupid" didn't arrive most days until after dinner.

It has been just another way to show my kids I love them and to do something fun for Valentine's Day especially since they are not in traditional school this year but are homeschooled. They haven't seemed to miss anything so far.

There are lots of creative ideas for Valentine's on Pinterest that you could incorporate into this project. Here are a few...
via BHG

via zakkalife
via make-it-do
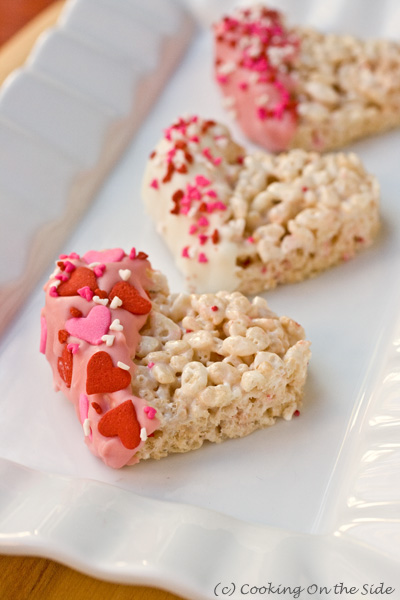
via cookingontheside
DIY scratch-off cards via patandlindsay
via SkiptomyLou
This idea can be used for any special person in your life - your spouse, nieces/nephews, grandchildren, friends, etc. Never let unimportant details prohibit you from doing something fun. ;) Like I did with the lack of finding a cute little mailbox!

Valentine's Day is almost here and I have one more project to share!

Monday, January 21, 2013

LOVE Pillow. Freezer Paper and the Cricut.

I have been pinning pillow ideas like mad on Pinterest. I don't know what started it. I have a whole board dedicated to pillow ideas. Ha.

So I finally took all that inspiration and did something with it. I had pinned a simple tutorial on creating a pillow slipcover. Here's the blogger's post on her site. It really is simple.

The thing that made me want to do a slipcover instead of just a regular pillow was the ease of sewing a slipcover (two seams and no sewing little holes closed after stuffing) and the ability to fold and store the slipcover with my holiday/seasonal decorations.

First I cut out my stencil using freezer paper and my Cricut. (Well, technically it's Elizabeth's, but I have taken it over.) You put the shiny side down on the cutting mat for the design. The shiny side is also the side you iron to your fabric.

The cutting settings I used successfully for the freezer paper were: Blade 4, Speed 3 (medium), Pressure 3 (medium). Here is a good site with more settings. I figured out the setting for freezer paper with trial and error on my own.

I bought drop cloth at Lowe's to use. It's a cheap way to get canvas. I washed it first and ironed before cutting it out. I put my stencil on my unsewn canvas to see how I wanted to space it out.

Why not do the stencil after I've sewed it? I envisioned messing up and having a whole slipcover already made that was unusable. If you're confident you won't do that then you can sew the slipcover first and then paint it on (with something protecting the underneath for possible seepage of course). Being my first, I wasn't feeling confident. ;)

So I ironed the shiny side down on my fabric with a hot iron (NO steam). Make sure it's all ironed smoothly down.

I used a round foam brush to blot it on but will probably use a regular foam craft brush next time. The paint did not seep through the fabric like I thought it might. I grabbed some papers from our paper recycle and had 2-3 layers of paper behind it. The first layer barely got any on it. If I did this on burlap then I imagine it would bleed through a lot more.

After I did my red paint. I felt it needed some "dimension" so I picked another red from my acrylic paints and with a dry brushing technique I added a little accent color.

I was hoping I hadn't messed up by adding the second red. It was all still rather wet. The good thing is that if I didn't like the color I could have gone back over with my other red.

After it dried I peeled the freezer paper off. It came right off - no sticking or pulling of the fabric. I have read that the freezer paper stencil can be reused. When I did remove mine, the bad thing I discovered was it obviously was not ironed securely on a couple of places.

See, that is why you don't sew it all together and then worry about things like this happening. ;) It didn't bleed a lot. I happened to have a beige paint color out from another project (more to come on that later!) and wondered if......

Yep, it covered it well. I buy cheap acrylic paint, folks, but if you want to know the color that covered, it was called Beachcomber Beige by Plaid Apple Barrel. You can buy it for less than a dollar at Walmart.

After that little bit of paint dried, I sewed my slipcover following the link I gave above.

I made my pillow 14x14 because that was one of the sizes of pillow inserts I had on hand. It looked cute. I was so so happy and excited and had to promptly take a photo with my phone and send the picture to a couple of my friends.

Andrew shared my crafty excitement too. He wanted to immediately put the pillow on the foyer bench (as I had planned) when it was completed so down the stairs we went from the craft room to the main level and foyer. :) It looks GOOD!

What I learned:

  • I thought I would be helping the process by "using" the hemmed edge of the drop cloth for a few of the edges. It was fine for the one edge of the back for the tuck-in part of the slipcover but not for the seams. I was able to sew it but it was extra thick in those areas.
  • I felt like my placement for my words were a bit off after the fact but really, who is going to walk in my door and analyze my pillow. Hopefully, they'll walk in, think "cute" and move on.
  • I cut my pieces 14 1/2" even though I knew my insert was 14" because I had read it's better to have a tight pillow than look baggy. I agree.
  • I need to *really* make sure all my freezer paper is ironed down next time.
  • The possibilities of this is limitless. I have some more ideas up my sleeve. I cannot wait! Think St. Patrick's Day. Think monogram. Think...well, there are a lot.

Here's a sneak peek at what else I've been working on for Valentine's Day. It includes paint, tissue paper and vinyl plus some other fun things. I hope it turns out so I can share it. Ha ha.

Thursday, January 3, 2013

Thankful Tree.

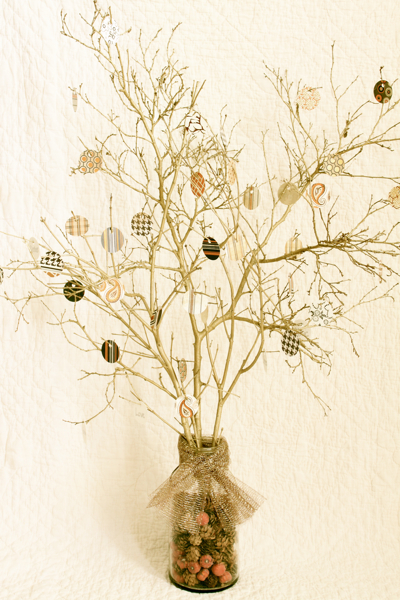
I came across something last year (really year before last - 2011) on Pinterest that I knew I had to do the next year for Thanksgiving. It was a "thankful tree".
Not Just a Housewife
So I did. (The lighting wasn't that great. I apologize.)


Elizabeth and I picked out four different patterns of scrapbook paper that we liked and that went with our decor (and that I thought looked "fall-ish"). She also helped me to cut out the leaves.

I cut little strips of wire (yes, I have things around like this from my days of scrapbooking and trying every new technique under the sun) and hot glued the little strips of wire to each leaf we had cut out. I put our little leaves in a basket beside the tree - each family member used the same patterned leaf for the month.

My girl was also my companion in going through the woods to find the "perfect" limb that would be our thankful tree. I had fleece pants on and she had sweat pants on. We came out of our woods with some 200 or more of three kinds of hitchhiking plants. It took longer to remove the seeds/burrs from our pants than it did to find and cut the limb.

Elizabeth and I were pretty tickled over our tree limb. Tickled because we though it had a nice shape and tickled because it was so big we knew Wade was going to die when he saw the size. (I was thankful for those eight-foot double front doors to bring that sucker into the dining room!) I had the terracotta vase/pot that I had spray-painted a soft white several years ago (for a baby shower). I also already had some river rocks that I used to keep the tree limb upright.

By the way, Wade didn't "die" and was a really good sport about it. He agreed that since we had the tall ceilings in the dining room (where I put our tree), the limb didn't look too big/tall. ;)

Starting the first of November (actually, I think we started on November 2nd because I didn't have everything ready), the four of us wrote something we were thankful for each evening. I will admit there were some nights that got skipped so we would do two or three the next evening. Generally, we would do them after dinner. We obviously didn't do one every evening up until Thanksgiving because when I counted how many were written, everyone except Elizabeth had written out sixteen. She had written twenty with two repeated. LOL

What's fun is inviting guests to join in. We had two interns, Zak and Danny, at our church during this time and had them over for dinner one night in November. They joined in with our family that evening by writing on a leaf. (I let them pick their own patterned paper color. LOL)

Danny:
I am thankful for
  • Farmers
  • Food
  • Friend Zak
  • Faithful Preacher and Pastor Jody
  • Fiance Ashley
  • FATHER GOD :)
(You can so tell he's a future preacher with all that alliteration.)

Zak:
Thankful for this family that took us in for dinner. 11-15-12 Gal. 6:14

What I liked about this:
We are always gone for Thanksgiving, spending the holiday with Wade's family. We don't have any traditions that we do at "our" home so I wanted to start this after pinning it last year. I feel our family is more thankful than most. We talk a lot (almost daily) about how the Lord has blessed us in so many areas (Wade's job, our health, freedoms, food, house,etc), but I thought it was important to get more specific and call them out individually. (♩♪♫♬ "Count your many blessings name them one by one..." ♩♪♫♬)

What I would do different:
The way I hand-cut the leaves, cut the wire and hot-glued it on was really too time-consuming. Next Thanksgiving I'll probably use the Cricut to cut out leaves (or do circles) and just punch a hole and tie a string on to hang them. It would be easier to disassemble when it's time to take it down too. Unwrapping all those wires were a pain because *I* was such a pain about wrapping them on (and making them tight so we didn't have droopy leaves). I think we'll continue throughout the whole month too and not stop at Thanksgiving. There are so many things to be thankful for that we wouldn't run out if we wrote something every day.

You can find more ideas on Pinterest with so many different styles for each person's taste. Here are a few favorites with the actual links:
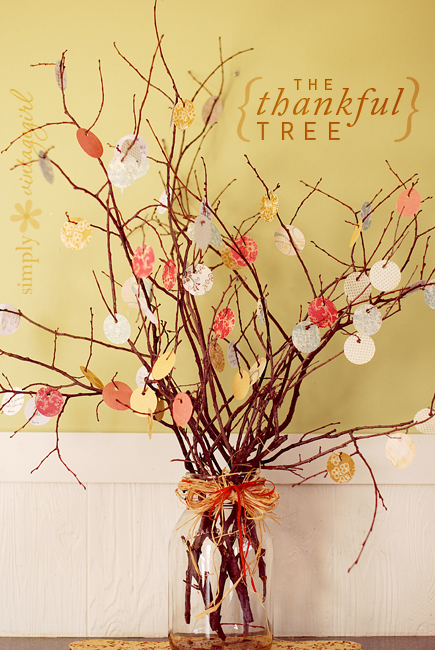
Simply Vintage Girl
Jones Design Company
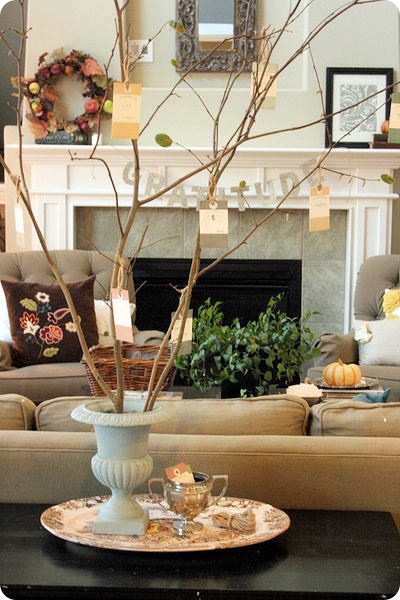
Decor Chick
Ellinee Journal
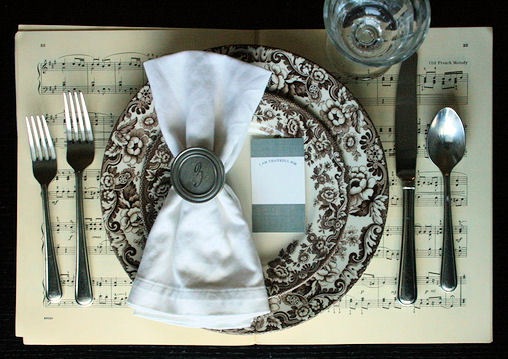
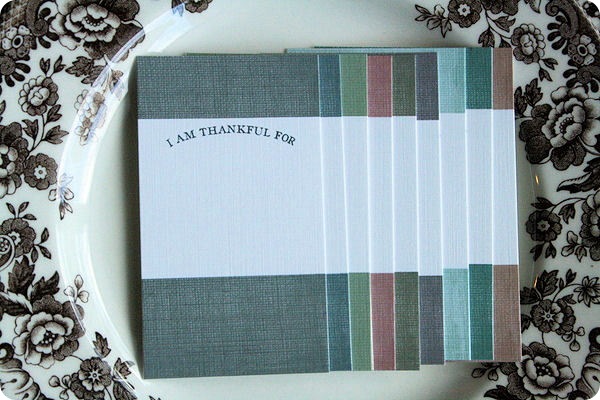
There are lots of ways to implement this. You could just do it for your family on Thanksgiving day and place a card/leaf/circle at each person's place for them to write something they're thankful.
Jones Design Company
You could start on the first day of November and it do it each day leading up to Thanksgiving or even continue for the entire month. It's an idea that you can take and make your own. Several blogs have free leaf or tag printables to download and help get you started.
Jones Design Company has these multi-colored tags for download. Click here.
Ellinee has these pretty leaves to download by clicking here.

I took our leaves down today and threw the tree limb outside until I can take it to one of our brush piles. I decided to keep our leaves and store them in our fall/Thanksgiving decor bin. They don't take up a lot of room. I wanted to share the things we were thankful for this year...

(These are not in the order they were written obviously.)
Leslie: five senses, God's grace and mercy, ability to vote (freedom), friends, Buffalo Ridge, The Holy Bible, a good rain on dry ground, salvation, my sweet kids :), Christian parents, hot chocolate, laughter!, a beautiful kitchen, Wade , internet shopping!! :), birthdays!

(I can guess the days I wrote about voting, internet shopping and birthdays! LOL)

Wade: prayer, grass, mercy, Bible, BCS, love, BRBC, warm, good food, salvation, Les, grace, coffee, family, rain, A, E

(I find it interesting how many things we have that are the same.)

Elizabeth: microwaves, salvation :), horses -> Gypsy Vanners, birthdays, keys, a house, pencils, horse -> paint horses, church family, my brother   computers, zebras, salvation, sugar, paper, rootbeer, my crazy cat Gracie, good food *yum*, refrigerators, birthdays

(Psychiatrists probably could tell a lot about us from these also....)

Andrew: Lizzer, Gracie!, a house, money, story cubes, Momma's tablet, computers, a bed, a tv, computer games, coffee, church, dairies and meats, birthdays, food, penguins

On Andrew's leaf that said, "a tv", it was in all caps and close together and I thought it said "ATV" at first. We have a four-wheeler so I thought he was thankful for that, but thought it strange he was calling it an "ATV" since we use the term "four-wheeler" and then I realized what he meant....I also found it interesting he named Gracie, our indoor cat. They have a love-hate relationship going...

I love Wade and I named each other and our kids and I love that the kids each named each other ("Lizzer" and "my brother "). I also smile over the fact that we each named some sort of drink (coffee, hot chocolate, rootbeer).

We didn't share what we were writing as we wrote them. In fact it almost became a "secretive" thing although I found each member of the family reading others' throughout the month. Ha.

Taken with my phone so you can see the enormity of it:

While Thanksgiving was a month and a half away, I hope you enjoyed our thankful tree and remember, it doesn't have to be the month of November to think of all the things you have to be thankful.

We are so blessed!

Monday, December 24, 2012

Christmas Time at the New House.

Glimpses of our Christmas decor this year.
The dining room has the most especially since it's housing the Christmas tree.
I have wanted a rosemary topiary for the last two or three years and finally got one this year! It smells wonderful, looks pretty and is usable. :)

I had these on our buffet in the dining room before. 
In the cream birdcage I used to have ivy growing. 
I added some small glass ornaments to it this year.

I have had this arrangement for a long time. It may be obvious.
I have our Hallmark "Snowtop Lodge" series around this.

See the detail and how cute the are? This is one of my favorites.

Our Tree

Here it is lit up. 
When I had taken this photo a couple of weeks ago there were no wrapped presents. ;)

Our entry bench.
I had bought the Merry Christmas plaque for our church's ladies' retreat and decided to keep it. Ha.
The basket I bought at World Market a couple of months ago for this space.
I cut some branches from our woods and added some lit branches.
I also added some holly berries and plan on swapping them out for each season for different items.

When the lit branches are on. So pretty. :)

I know my poor built-ins are in desperate need of items.
It will come.
I have plans.
It's just been busy.
For now our Christmas decor is trying to fill the space some.

The other side of the fireplace...
Wade and I bought this little tree at Silver Dollar City probably 12 years ago.

Our stockings are hung by the fire with care...

Look at the smart idea Wade come with to hang our stockings without putting nails in the wood. Yes, we have stocking hangers but we've had problems with them in the past not holding the weight of our stockings. At our last house one fell and put a good nick in the granite hearth.


I was proud of his idea though.
Doesn't that look like something you'd find/learn on Pinterest?!?! LOL

I have this small grouping in our powder room. I've had the deer for a few years and bought the trees last year at an area festival.

Wade's granddaddy gave me this I believe the first Christmas we were together.
It's a sweet nativity scene to add somewhere. 
I have it on our hall chest which is in our entry from the garage.

Going downstairs. I have a few Christmas-y things there.
My rustic nativity scene and a little topiary on the other side.

Back in the kitchen. A simple towel to add flair.

Out at the front door.
I have big plans for this next year.
Two doors = two wreaths and lots of fun possibilities. ;)
I got the sled and wreath idea from Pinterest.
The greatest compliment? 
When my neighbors came to our house for dinner she loved the idea 
and promptly put one of her kids' sleds up the next day. Hee hee.
That red runner is from my childhood.

My JOY from last year. My mom and I made this.
The birds (mainly blue birds) love to perch on it. It's so cute when they're on the tip of the star.

For our gifts....
I had a huge roll of builder's grade kraft paper for hanging pictures.
Plus I had seen lots of cute ideas for wrapping gifts in the brown paper on Pinterest.
So I used that big ole' roll and love the results.


I also used some scrapbooking paper on smaller gifts.


I had fun learning to make pom poms too.

I combined some of the wrapping paper I had from last year on a lot of the gifts.
I fired up my Elizabeth's Cricut and made tags.


One thing I did learn is that you cannot use Scotch Magic tape to wrap them. It WILL NOT hold. You must use Scotch (or probably any brand) CLEAR tape. I had to replace LOTS of tape.

The thing I liked most about wrapping this way was starting out with a blank canvas (the kraft paper) and getting be creative. Some I was more creative than others obviously but that's the way it always goes when you're crafting/creating. 

I plan on doing this for birthday gifts in the future!

I hope you enjoyed reading about our Christmas decor. I hope to do more next year since we'll be more organized and settled in then.

Merry Christmas!
Remember our Savior's birth as you celebrate with family this year.