Showing posts with label crafts. Show all posts

Friday, September 20, 2013

Glimpse of Fall. Some Fall DIYs.

Here are some Instagram photos of the fall decor I currently have up in the house. I put all of it up on Labor Day! Remember, I didn't get to decorate last year because we moved into our house in October. (By the way, October 10 will be a year since we moved in!! Wow! That has really driven me to get some more things up on the walls.)

Front entry


I made this simple envelope pillow cover one Saturday afternoon. I cut out leaves and acorns from freezer paper using my Cricut. I arranged the negative parts of the freezer paper on my fabric and ironed it on then used several different acrylic craft paints. I added some brown metallic paint to give it a little shimmer, warmth and dimension. I just wish I had used a different yellow. We are our worse critics, aren't we? (See this post for more details to DIY.)

One of the happiest things about getting my fall decor out was that I had a LOT of new items I had forgotten I bought almost two years ago. Year before last I went to Hobby Lobby when they had their fall decor items marked 80% off. Since I didn't decorate last year, it was like Christmas when I started pulling items out this year. It was so fun! This is one of the simple items I had bought and paid under $2 that I probably would have never bought even at half price. But 80% off - it was a great buy! ;)

Great Room

I bought this glass blown pumpkin at Marshall's last month when on vacation.

My fireplace for now. I want to add more fall items, specifically some type of garland.

A cute acorn I bought at Michael's recently. :)

I filled a hurricane vase with this beautiful fall potpourri that was part of the goodies I found.

Look, I finally have a lamp in our built-ins. I had intentions of buying a simple pole lamp and DIY'ing one to give it texture using drift wood. I had found the idea on.....can you guess? Yes, Pinterest, but I have had a hard time coming across drift wood. I did get several pieces while at the beach this past winter but for some weird reason it's hard to find on our beach at Isle of Palms. So I finally relented and decided to buy one that I liked. I wanted wood and some type of texture. I found this at Marshall's.

Dining Room Table


These gorgeous glazed ceramic pumpkins were some of the things I forgot I had bought. I pulled one out of a bag and was so excited. Imagine my happiness when I found two more! I had also bought the fabric-like leaves two years ago at Hobby Lobby.

Kitchen

This is the hall chest in the entry area from our garage to our kitchen. I always have had a hard time decorating it with the two levels on top. This is how it's currently looking for fall. Subject to change. Ha ha.

Some of the turkey feathers from our land. I found the leaf idea on Pinterest, followed the website for directions and made myself one. I used the same process as the pillow above with freezer paper, my Cricut and burlap. I used a metallic brown craft paint that gives it a great sheen. Here's a peek at the process below.


I think I actually put this little wreath up a week before Labor Day. I have been itching to decorate for a while, I tell ya! I like how this looks. I used a 3M Command hook. I may have to replace it with a Christmas one come December.

West Porch


This Indian corn is some my parents gave me probably not long after Wade and I were married. It's from some my dad had grown many years ago. My dear kitties (I think just Dory) has been messing with it obviously as I noticed several kernels had been busted (eaten?). My friend, Katy, gave me the leaf covered jar either last year or the prior year. (She made them using this technique.)

My only two pumpkins from my garden before the powdery mildew got the plants. I am just leaning my little "welcome" sign up for now. I want to make this (below) or have my dad help make it eventually. For my version I want to make the arm that extends out have a pole to hang a flag on it also.


I hope you enjoyed a glimpse into my fall decor. I have a few more areas "lightly" decorated and hope to add more. We bought some mums the other day that I plan on adding to the urns by the front door.

Fall will officially be here Sunday! :)


Monday, June 10, 2013

Summer Has Started.

Last week we were on vacation and though we have been finished with school for a month now, I feel like summer has officially started.

While on vacation Wade and I talked about how we don't want the kids glued to the computer or TV all day long. They have a LOT of free time now. Yes, they have responsibilities every day and help me do a good 2/3 of the cleaning but there's still time left since we're not in school.

What to do? Yes, we have 17 acres of land out waiting to be tromped on but it's summer. Summer = hot. I'm not one who likes to get too hot; Elizabeth's the same way so I sympathize.

Wade and I decided they needed more to do outside too. At our old house they had a neighborhood to ride their bikes around, they had a clubhouse, sandbox, swings, etc. It just seemed easier for them to go out for longer periods because they had more to do. So we have decided to 1) get a trampoline (something we've been against all this time because of the accidents but I'm hoping we'll be one of the few who don't get hurt plus I've always secretly wanted one!) and 2) get a basketball goal.

I'm not sure when these items will be purchased and then put together (that's going to be the bigger deal) but we do have a plan. The kids are excited and I'm excited.

We also have a huge reduction in online time which the kids aren't too happy about but we'll all adjust to. We've already had some grumbling this morning but they have seemed to mellow out.

This simple experiment that I found it via Pinterest on this blog helped...

Instructions: Pour about 1 cup of milk in a large enough pan or bowl so that it's shallow. (We used milk that was almost expired so that I didn't feel so wasteful.) You're going to use three colors of food coloring (primary colors - red, blue and yellow) and you want them alternating in a circle toward the middle of the pan. Drop one drop of each color 1/3 of the way around in a circle, dropping each color three times. (Ex. Drop red, blue, yellow, red, blue, yellow, red, blue, yellow.) Now have your camera pointed at your child as you instruct them to drop one drip of dish liquid in the middle of all the colors. You can see what happens - the magic - afterwards. Catching their face in surprise is the best.


I wasn't fast enough but Andrew's eyes lit up. I had Elizabeth do it later - she was in her room reading at the time - but she didn't have much of a reaction facial wise. LOL Since it was my second time around instructing a kid on how to do the "experiment", I had Elizabeth put her drops of food coloring closer which worked better. So that's a tip for anyone who tries this.

I have some other ideas ready to hopefully turn glum attitudes into happy ones. I don't have to have "happy" but would like "content". We also plan on having cooking projects once a week and craft/art projects once a week. This is all dependent on how busy our weeks are - we already have three appts this week for dental, allergy doctor, etc plus riding lessons. Next week Andrew will be gone to camp and the week after Elizabeth will be going. Yes, summer is in full swing and it's going to be busy except when we don't have things going on and that's why I'm trying to give them things to do and help them learn to occupy themselves WITHOUT the computer and TV.

Are any of my mom friends out there making plans or have made plans to help with long, hot summer days? I'd love to hear about them!

Friday, February 15, 2013

Quick Valentine's Day Art.

I had a couple of other projects planned for Valentine's Day but the days have gone by too quickly. Most of my creating is done on Saturdays. I was at church last Saturday from 8:30 until 5:30 with visitation, decorating for a baby shower and helping with the baby shower (and then clean up). Unfortunately, my poor children had to be there that entire time as well. They enjoyed the visitation - and breakfast prior - and behaved well during the baby shower stint. I had prepared them by having them bring things to do, thankfully.

Here is a banner I made for the shower using my Cricut. It was pretty simple since the Cricut did most of the work. I think it turned out cute!


It has the baby's name - Eli Marcus. My friend is doing the nursery in these colors (blue, green and brown) and also doing a sports theme so I cut out a football and soccer ball to add decoration. The cartridge I used for this was Country Life except for the football and soccer in which I used Life's a Party.

So back to Valentine's Day - I always digress (LOL) - here is a super simple project I made using some of the red patterned fabric I had bought at Hobby Lobby. I bought the smallest amount allowable and spent less than $3. 

As you can probably tell just by looking at this, I cut hearts out of the fabric. I used a white pencil to trace a heart I had cut out of cardstock and used my fabric shears to cut them out. Using textured white cardstock cut to 8x10 as the background, I attached the fabric hearts with glue dots.

Here are some of the projects I had found on Pinterest that inspired me to make this....
via JustMakeStuff
via mondocherry
Lots of inspiration on this mantle via Landee See, Landee Do
I found all of these on Pinterest but I like to get the exact link when I share because I want to give the blogger/creator full credit. There is so much inspiration out there! If there's something you want to learn to do then there's a good chance there's a video or tutorial out there on how to do it.

Hope everyone had a great Valentine's Day!

Saturday, February 9, 2013

Countdown to Valentine's.

If you let it then Pinterest can really intimidate you. If you let it then it'll make you think you are the only one out there who doesn't cut your child's pb&j in a different animal shape every day, that you are the only one who doesn't make your own window treatments for your home and that you are the only one who doesn't make your own all natural cleaners for the home. LOL Really, I think some people go on Pinterest and have similar feelings as those. I know that it's really people who create these things as an outlet while their kids are napping or are at school or who have blogs for businesses and get paid to be creative. They don't all fall into those two categories though.

For me being creative and doing crafty things makes me so happy. I like doing it for myself, and I like doing it for my family. I have had many friends in the years past tell me they are not creative. I have a lot to say about that which I will not get into on this post - maybe some other time when I'm thinking about it again and want to share my thoughts on the subject. ;)

Back to Pinterest and being crafty though - I am enjoying trying new foods and crafting adventures I find on there. You can check out my "completed pins" board to see what I've tried/made and what I think about it in the comments. One thing I had pinned and wanted to do for Valentine's Day involved a countdown to Valentine's starting the first of February. Kids like countdowns! We do an advent calendar every Christmas that is a favorite. I think I may create something eventually for the kids for their birthday for a countdown. Well, on the other hand, I probably don't need to as they start their own countdown at least a month in advance!

Here's the image I had found on Pinterest:
via How Does She?
The problem was that I could NOT find any of these cute little mailboxes. None at Hobby Lobby or Michael's. Those are my only two choices in our area. I did look at Walmart (just in case) too with no luck. So I made do with what I did find and went with it - embossed paper mache boxes.


I tried to play with the embossed parts and the paint. I mixed some browns for the first box trying to get a "chocolate" brown color. After I painted several coats and let it dry, I used a makeup sponge and very little red paint to lightly rub across the embossed area trying to just hit it the high points. As you can see I had a little too much paint on a few places. I also used the red for the top edge of the box lid. 

I used scrapbook paper from my stash to put inside both boxes which I painted first. For the bottom heart box I painted it white first (a couple of coats) and then red (another couple of coats). I used a fine grit sanding block to take off the red to show the white underneath. Both projects went fairly quickly. The paint dried quickly. Probably the slowest part was cutting the paper to fit inside which I adhered with Mod Podge. I also applied a top coat of Mod Podge to help seal the paper.

The kids loved them and that's what counts. ;) They enjoyed seeing each day what "Cupid" was going to leave them. I called myself "Cupid" which they thought was pretty funny. LOL

The boxes did take a little bit of a beating with the constant on and off of the lids. I wish I hadn't put paper inside the inner edges of the lid since it was sort of tight and rubbed some. It would probably do good to put another coat or two of Mod Podge on it.

Things I put inside the boxes included little treats such as packaged muffins, Combos, gum, Mentos, Hershey kisses & hugs, etc. Yes, mostly junk food which meant that "Cupid" didn't arrive most days until after dinner.

It has been just another way to show my kids I love them and to do something fun for Valentine's Day especially since they are not in traditional school this year but are homeschooled. They haven't seemed to miss anything so far.

There are lots of creative ideas for Valentine's on Pinterest that you could incorporate into this project. Here are a few...
via BHG

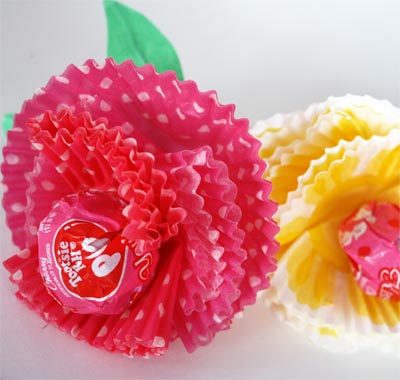
via zakkalife
via make-it-do
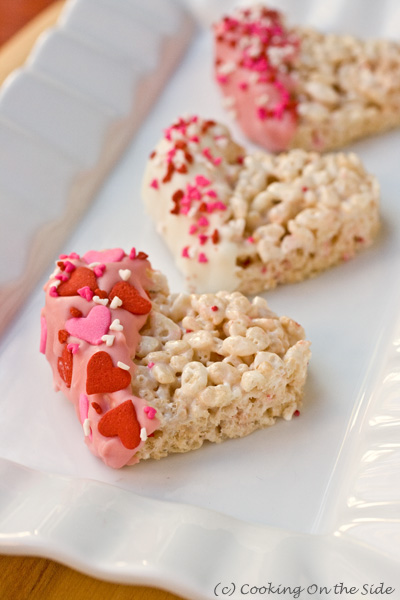
via cookingontheside
DIY scratch-off cards via patandlindsay
via SkiptomyLou
This idea can be used for any special person in your life - your spouse, nieces/nephews, grandchildren, friends, etc. Never let unimportant details prohibit you from doing something fun. ;) Like I did with the lack of finding a cute little mailbox!

Valentine's Day is almost here and I have one more project to share!

Thursday, January 31, 2013

Valentine Canvas Art. DIY.


I finished my Valentine canvas project last Saturday evening but we have had two of our friends' kids staying with us for the last five nights. Between feeding, homeschooling and living our daily lives with two extra kidlets, I'm just now getting to post about my project.

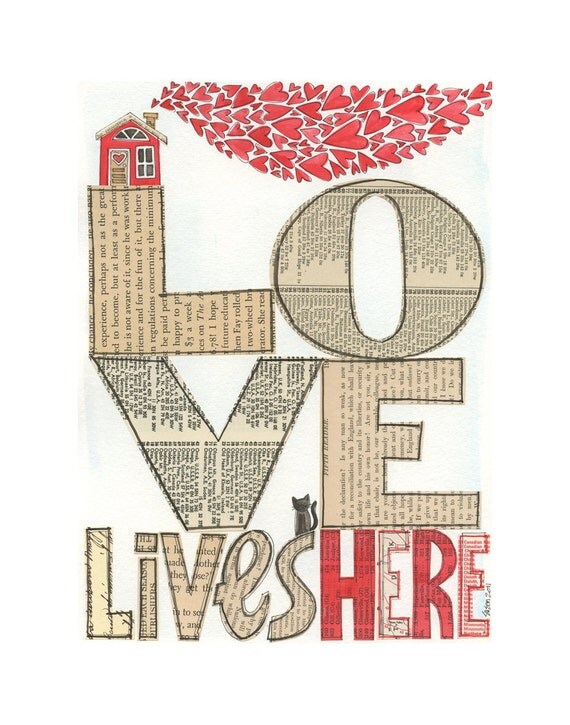
I had seen a mixed media piece on Etsy that I really liked. I wanted to try my hand at making my own version using it as inspiration. I stayed very close to the original art as you can see.
Original art used for inspiration.
I looked at my Cricut cartridges for the letters and found I had a house and cat that would work for this project. I did buy a cartridge for the LOVE letters (found a good deal on Ebay) although I could have cut them out since they were pretty basic. You may recognize the font from my last Valentine's project. Cartridges used: Cuttin' Up (LOVE), Designer's Calendar (other words & cat), Hoot 'n' Holler (house & heart)

I figured out how tall I wanted my letters and house to fit my 12x16 canvas.Using cheap white cardstock (from a pack found at Walmart in the office section not meant for scrapbooking), I cut out the letters to see if it was the right size before I used my not-cheap vinyl. ;) I cut the letters for LOVE four inches tall and the other letters three inches although I used a different font for the I and E in "lives".

I did want the word HERE and the house and hearts in red so I marked off that area of my 12x16 canvas using painter's tape. (By the way, I found canvases are like wood boards - the measurements are not exactly what they are supposed to be but a bit smaller.)

After that dried. I taped off the red to protect it and then painted the rest of the canvas with some tans.

*Tip* Do not paint thickly up to the tape or take the tape off while it's still wet so you can smooth the paint out and not have a line that obviously shows it has been taped off and painted (like mine did).

I then cut out my vinyl letters. I was able to fit almost all of my letters I needed on a piece of 8 1/2 x 11 inch vinyl cut from the longer roll I had on hand. I have learned how to move the blade around on the material I'm cutting out to help keep waste of product to a minimum.

Tips on cutting vinyl with your Cricut (which could probably be useful with other digital cutters).

With the help of a few heart punches and my old swivel knife (man, I haven't used that thing in a loooong time!), I cut out a bunch of hearts for the "smoke" from my house. This didn't take as much time as it may look.


I preferred to use the swivel knife for most of the hearts. In one fluid motion I started at the top center of a heart design and would cut to the left down and back up to the right and center. I could probably cut one heart out every two seconds at least. It was like drawing a heart without lifting your pen if that helps.

I used scrap pieces of vinyl from between the letters I had cut out with the Cricut to cut my hearts. I also used these scrap pieces to cut out my other two letters.

The canvas is ready for me to apply the paint to cover it all up!
 

All those hearts...

I picked three colors of gray/silver to use for the top coat. Two were grays and then I had a metallic silver that I mixed in to add a shimmer. I just squirted them on......

and using a foam brush I painted the colors toward the top right corner. I didn't want the strokes to go up and down or left and right. I wanted a little different direction. You may notice I also painted my red and tan blocks in different directions as well. Just mixing things up. This was all new to me and I enjoyed the experimenting!

It's covered! I ended up having to paint two coats to completely cover the colors underneath.

My vinyl on the edges sort of came unstuck but I pushed them down as much as I could before covering them. I knew it was the edges of the canvas and wouldn't be as noticeable. If I had to then I could either paint all the edges the gray/silver or touch up with some reds to complete the shapes.

While that dried I cut out the tissue paper I picked for my LOVE letters. I found this tissue paper in the scrapbooking section at Michael's. It took a little experimenting to figure out what settings to use for the Cricut to get a good cut.

Cricut Tissue Paper Cut Settings: Blade 4, Speed 1, Pressure 2.


Time to take all that vinyl off! This part was pretty exciting, I have to say! I used an exacto knife to get most of the pieces up so I could peel them off the rest of the way.

When I took the heart off in the bottom right corner, I just stuck it on the inside of my house. It would come right off if I wanted to take it off but decided I liked it there and left it. I liked how the original art had a door and windows but this was simpler.

I just used Mod Podge to put the tissue letters on and only put it where the letters were going. I did cover them with a thin coat afterwards.

There were some hearts that bled through. I thought about touching up with more red paint. After I did all the outlining, I decided they were fine as is.

The outlining was the time-consuming part. At times I thought my eyes were going to cross (and I think they did) so I broke it up into a few different sessions. The outlining made the whole thing pop and completed it.

I did wonder if I should have outlined the LOVE but decided not. I asked my fellow resident artist (Elizabeth) and she said I shouldn't. Who knows, I may decide to outline it next year when I pull it out again in January. Looking at the two pieces side by side makes me think I should now. Ha ha.

I wanted to make my little heart in the lower right corner sparkle more so I looked through my stash of Stickles (basically a glitter glue) and picked one. I applied just a little to make it more noticeable when the light hit it just right.
 

And now for the two projects side-by-side. I used the vinyl for the cat instead of using a mask to paint one or drawing one on. I had to add a cat since we have our own sweet kitty in our family. ;) 

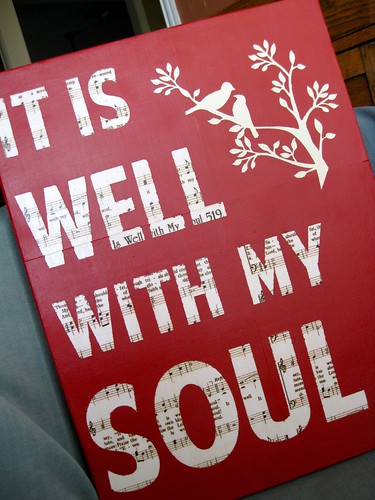
Here are some other ideas that you could create using this method although the artists/crafters below did not necessarily use it. I just see these projects and know it's possible:
Link and Pin
Link and Pin

Link and Pin
Link and Pin
Link and Pin
Link and Pin
Link and Pin
One more picture. To the left of my project you see my sweet grass basket from Charleston. That was my Mother's Day gift last year. Wade gave me the money to buy one when we went to Isle of Palms on vacation in June. I have wanted one for several years but 1) couldn't afford one and then when I sort of could I 2) didn't want to pay the money for one. But knowing we were moving into the new house I knew I wanted one for my built-ins. It currently resides on my mantel though. Ha.

This particular art project doesn't have to exclusively be for Valentine's Day. "Love lives here" is a good quote to have up year round.

A peek at my next project......It's a simple one. Yes, I've become quite the crafter of late. :) Ha ha.