Saturday, January 26, 2013

Canning Paint.

While we're thawing out from an ice storm that hit the South yesterday......
Circular air bubbles from the water freezing rapidly.
My poor ice-laden tree yesterday.
Now melting...
I am "canning" paint this morning. ;)

I am completing a project I started last weekend during our snow storm inspired by another blogger I found on Pinterest. (Pin) (Blog post)

When we moved I brought some leftover paint from the old house with us. Why? I have been inspired by many pins by bloggers and DIY'ers on Pinterest that I thought I may need some of my fun colors later for projects. ;) I kept the bold reds from my old kitchen, the calming blue from the kids' old bathroom and the happy green from my old laundry room.

I bought a dozen of wide-mouthed Mason jars at Walmart for around $11. You could find them cheaper during canning season or if you don't buy "name brand" or if you get them second hand at a yard sale. (Our Walmart didn't have their brand in that size.)

I got rid of six paint cans from our last house and some from our current home doing this. Look how much space I have saved! :)

Why I like this idea:
1. It takes up so much less room than all the cans!
2. It looks prettier. I realize the colors will separate some and not look as pretty eventually but look at them now. LOL
3. I hate how paint cans rust and when you open them later to touch-up the rust falls into the paint. Yes, I said "hate". I don't usually use that word unless it's something I reeeeeally HATE. ;)
4. You can reuse the jars for storing more paint or for something else.
5. When touching up it's easier to shake and mix up a smaller container of paint.
6. It's also easier to walk around with a jar of paint and a foam brush instead of a bulky paint can. I usually use craft brushes for small touch-ups as I'm lazy and hate detest cleaning up regular paint brushes. I could use the "h" word here again but won't.
7. You can just unscrew the lid and not go find a screwdriver or one of those paint can openers when you need to get to it.
8. It is a relatively cheap storage solution as mentioned above.

While I was working on this post, I walked through the house and look what I saw!

Seven deer!!

Our deer population is growing! While Wade and I are excited about it right now, I may be lamenting their presence come spring and summer. I have already started pinning flower ideas on Pinterest that are "deer resistant" for our back flower beds I will be planting.

54 days until Spring!

Monday, January 21, 2013

LOVE Pillow. Freezer Paper and the Cricut.

I have been pinning pillow ideas like mad on Pinterest. I don't know what started it. I have a whole board dedicated to pillow ideas. Ha.

So I finally took all that inspiration and did something with it. I had pinned a simple tutorial on creating a pillow slipcover. Here's the blogger's post on her site. It really is simple.

The thing that made me want to do a slipcover instead of just a regular pillow was the ease of sewing a slipcover (two seams and no sewing little holes closed after stuffing) and the ability to fold and store the slipcover with my holiday/seasonal decorations.

First I cut out my stencil using freezer paper and my Cricut. (Well, technically it's Elizabeth's, but I have taken it over.) You put the shiny side down on the cutting mat for the design. The shiny side is also the side you iron to your fabric.

The cutting settings I used successfully for the freezer paper were: Blade 4, Speed 3 (medium), Pressure 3 (medium). Here is a good site with more settings. I figured out the setting for freezer paper with trial and error on my own.

I bought drop cloth at Lowe's to use. It's a cheap way to get canvas. I washed it first and ironed before cutting it out. I put my stencil on my unsewn canvas to see how I wanted to space it out.

Why not do the stencil after I've sewed it? I envisioned messing up and having a whole slipcover already made that was unusable. If you're confident you won't do that then you can sew the slipcover first and then paint it on (with something protecting the underneath for possible seepage of course). Being my first, I wasn't feeling confident. ;)

So I ironed the shiny side down on my fabric with a hot iron (NO steam). Make sure it's all ironed smoothly down.

I used a round foam brush to blot it on but will probably use a regular foam craft brush next time. The paint did not seep through the fabric like I thought it might. I grabbed some papers from our paper recycle and had 2-3 layers of paper behind it. The first layer barely got any on it. If I did this on burlap then I imagine it would bleed through a lot more.

After I did my red paint. I felt it needed some "dimension" so I picked another red from my acrylic paints and with a dry brushing technique I added a little accent color.

I was hoping I hadn't messed up by adding the second red. It was all still rather wet. The good thing is that if I didn't like the color I could have gone back over with my other red.

After it dried I peeled the freezer paper off. It came right off - no sticking or pulling of the fabric. I have read that the freezer paper stencil can be reused. When I did remove mine, the bad thing I discovered was it obviously was not ironed securely on a couple of places.

See, that is why you don't sew it all together and then worry about things like this happening. ;) It didn't bleed a lot. I happened to have a beige paint color out from another project (more to come on that later!) and wondered if......

Yep, it covered it well. I buy cheap acrylic paint, folks, but if you want to know the color that covered, it was called Beachcomber Beige by Plaid Apple Barrel. You can buy it for less than a dollar at Walmart.

After that little bit of paint dried, I sewed my slipcover following the link I gave above.

I made my pillow 14x14 because that was one of the sizes of pillow inserts I had on hand. It looked cute. I was so so happy and excited and had to promptly take a photo with my phone and send the picture to a couple of my friends.

Andrew shared my crafty excitement too. He wanted to immediately put the pillow on the foyer bench (as I had planned) when it was completed so down the stairs we went from the craft room to the main level and foyer. :) It looks GOOD!

What I learned:

  • I thought I would be helping the process by "using" the hemmed edge of the drop cloth for a few of the edges. It was fine for the one edge of the back for the tuck-in part of the slipcover but not for the seams. I was able to sew it but it was extra thick in those areas.
  • I felt like my placement for my words were a bit off after the fact but really, who is going to walk in my door and analyze my pillow. Hopefully, they'll walk in, think "cute" and move on.
  • I cut my pieces 14 1/2" even though I knew my insert was 14" because I had read it's better to have a tight pillow than look baggy. I agree.
  • I need to *really* make sure all my freezer paper is ironed down next time.
  • The possibilities of this is limitless. I have some more ideas up my sleeve. I cannot wait! Think St. Patrick's Day. Think monogram. Think...well, there are a lot.

Here's a sneak peek at what else I've been working on for Valentine's Day. It includes paint, tissue paper and vinyl plus some other fun things. I hope it turns out so I can share it. Ha ha.

Saturday, January 19, 2013

Snow Storm.

Our first real snow came Thursday afternoon. We had our first dusting on the winter solstice (December 21) but this snow. This snow. It was a doozy! It had been raining all day. Really, it had been raining ALL week and it finally turned to snow. The weather people got this one right.

Wade was still at work when the rain finally turned to snow. He had asked me to let him know when it started snowing. He was trying to decide when to leave. I took a picture at 3:00 with my cell and sent him a text. Then it got heavier and I continued to take more photos. I ended up sending him photos at 3:00, 3:30 and 4:00. When I realized how I had accidentally timed the photos, I kept taking them in 30 minute increments just to document it.


The kids got out in it when it hadn't been falling too long.


It was beautiful looking out one of my bathroom windows.

I measured 3 inches but I think it snowed more than that.
My poor husband finally rolled (slowly) up the driveway just a couple of minutes after five. He wasn't sure he was going to make it up when he first pulled in. I thought I was going to have to meet him at the bottom of the driveway with his Muck boots. Have I mentioned we have a 1000 foot driveway? LOL

It took him an hour to get home instead of the usual 20 minutes. I think I stared out the front about that whole time. It brought back memories of when we had a huge storm I *think* around 1999 and it took him 3.5 hours to get home which again at that time we were around 20 minutes from his work. I stared out our picture window the entire time. Cell phones weren't working then. We had problems with them working this time too.

Thankfully, we didn't lose our power. I had the kids shower, charged up cell phones and did laundry until there wasn't nary a dirty article in the house. I fed the kids warm food and tried to prepare *just in case*.

The next day the sun was shining and the snow was still good for sledding so the kids sledded in the front field and had a good time.

Wade had his annual partner and manager's retreat this weekend but it was partially cancelled. The good part was cancelled. We were to stay at the Martha Washington Inn. The partners and managers met most of the day Friday and Saturday morning. We did get to go out Friday evening for dinner. The sunset was beautiful (as usual) when we left.

The roads were fine that evening. Nothing like when Wade had to come home on Thursday!

I'm going to show a Pinterest project in the next post that I did this weekend!

Thursday, January 3, 2013

Thankful Tree.

I came across something last year (really year before last - 2011) on Pinterest that I knew I had to do the next year for Thanksgiving. It was a "thankful tree".
Not Just a Housewife
So I did. (The lighting wasn't that great. I apologize.)


Elizabeth and I picked out four different patterns of scrapbook paper that we liked and that went with our decor (and that I thought looked "fall-ish"). She also helped me to cut out the leaves.

I cut little strips of wire (yes, I have things around like this from my days of scrapbooking and trying every new technique under the sun) and hot glued the little strips of wire to each leaf we had cut out. I put our little leaves in a basket beside the tree - each family member used the same patterned leaf for the month.

My girl was also my companion in going through the woods to find the "perfect" limb that would be our thankful tree. I had fleece pants on and she had sweat pants on. We came out of our woods with some 200 or more of three kinds of hitchhiking plants. It took longer to remove the seeds/burrs from our pants than it did to find and cut the limb.

Elizabeth and I were pretty tickled over our tree limb. Tickled because we though it had a nice shape and tickled because it was so big we knew Wade was going to die when he saw the size. (I was thankful for those eight-foot double front doors to bring that sucker into the dining room!) I had the terracotta vase/pot that I had spray-painted a soft white several years ago (for a baby shower). I also already had some river rocks that I used to keep the tree limb upright.

By the way, Wade didn't "die" and was a really good sport about it. He agreed that since we had the tall ceilings in the dining room (where I put our tree), the limb didn't look too big/tall. ;)

Starting the first of November (actually, I think we started on November 2nd because I didn't have everything ready), the four of us wrote something we were thankful for each evening. I will admit there were some nights that got skipped so we would do two or three the next evening. Generally, we would do them after dinner. We obviously didn't do one every evening up until Thanksgiving because when I counted how many were written, everyone except Elizabeth had written out sixteen. She had written twenty with two repeated. LOL

What's fun is inviting guests to join in. We had two interns, Zak and Danny, at our church during this time and had them over for dinner one night in November. They joined in with our family that evening by writing on a leaf. (I let them pick their own patterned paper color. LOL)

Danny:
I am thankful for
  • Farmers
  • Food
  • Friend Zak
  • Faithful Preacher and Pastor Jody
  • Fiance Ashley
  • FATHER GOD :)
(You can so tell he's a future preacher with all that alliteration.)

Zak:
Thankful for this family that took us in for dinner. 11-15-12 Gal. 6:14

What I liked about this:
We are always gone for Thanksgiving, spending the holiday with Wade's family. We don't have any traditions that we do at "our" home so I wanted to start this after pinning it last year. I feel our family is more thankful than most. We talk a lot (almost daily) about how the Lord has blessed us in so many areas (Wade's job, our health, freedoms, food, house,etc), but I thought it was important to get more specific and call them out individually. (♩♪♫♬ "Count your many blessings name them one by one..." ♩♪♫♬)

What I would do different:
The way I hand-cut the leaves, cut the wire and hot-glued it on was really too time-consuming. Next Thanksgiving I'll probably use the Cricut to cut out leaves (or do circles) and just punch a hole and tie a string on to hang them. It would be easier to disassemble when it's time to take it down too. Unwrapping all those wires were a pain because *I* was such a pain about wrapping them on (and making them tight so we didn't have droopy leaves). I think we'll continue throughout the whole month too and not stop at Thanksgiving. There are so many things to be thankful for that we wouldn't run out if we wrote something every day.

You can find more ideas on Pinterest with so many different styles for each person's taste. Here are a few favorites with the actual links:
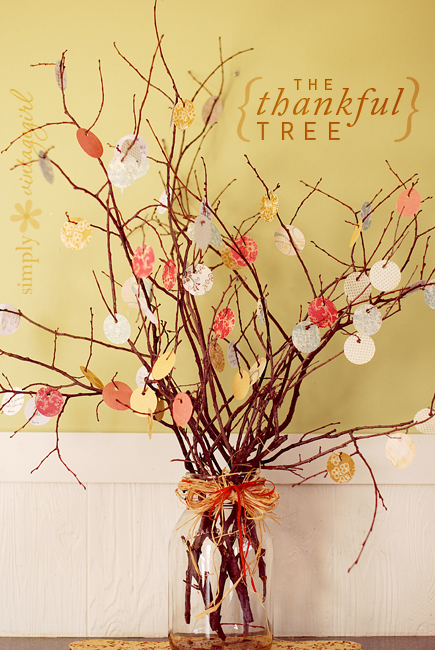
Simply Vintage Girl
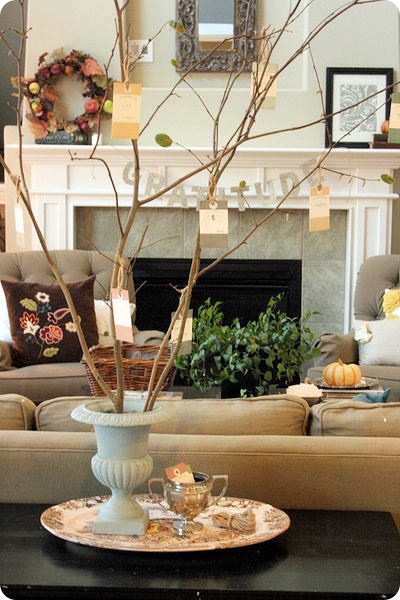
Jones Design Company
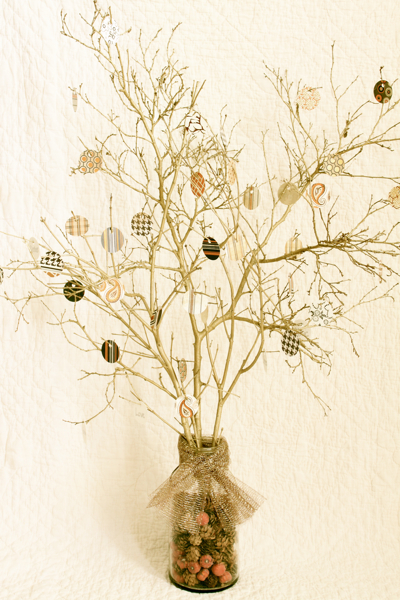
Decor Chick
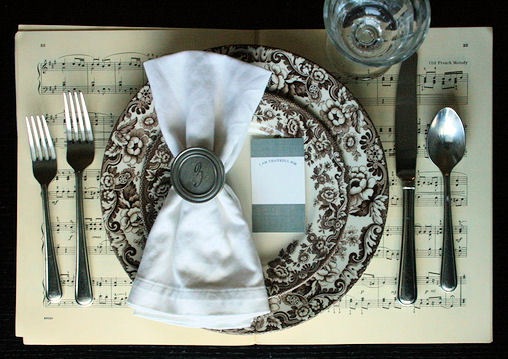
Ellinee Journal
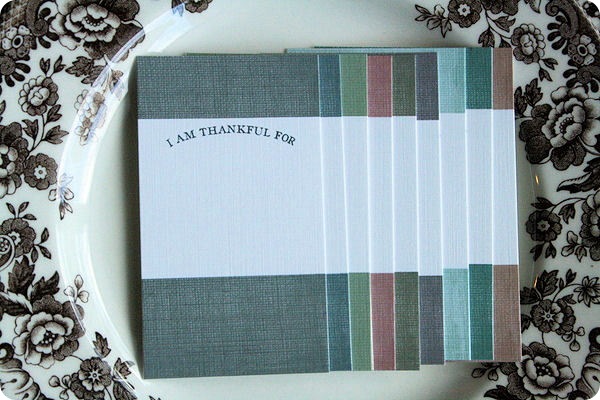
There are lots of ways to implement this. You could just do it for your family on Thanksgiving day and place a card/leaf/circle at each person's place for them to write something they're thankful.
Jones Design Company
You could start on the first day of November and it do it each day leading up to Thanksgiving or even continue for the entire month. It's an idea that you can take and make your own. Several blogs have free leaf or tag printables to download and help get you started.
Jones Design Company has these multi-colored tags for download. Click here.
Ellinee has these pretty leaves to download by clicking here.

I took our leaves down today and threw the tree limb outside until I can take it to one of our brush piles. I decided to keep our leaves and store them in our fall/Thanksgiving decor bin. They don't take up a lot of room. I wanted to share the things we were thankful for this year...

(These are not in the order they were written obviously.)
Leslie: five senses, God's grace and mercy, ability to vote (freedom), friends, Buffalo Ridge, The Holy Bible, a good rain on dry ground, salvation, my sweet kids :), Christian parents, hot chocolate, laughter!, a beautiful kitchen, Wade , internet shopping!! :), birthdays!

(I can guess the days I wrote about voting, internet shopping and birthdays! LOL)

Wade: prayer, grass, mercy, Bible, BCS, love, BRBC, warm, good food, salvation, Les, grace, coffee, family, rain, A, E

(I find it interesting how many things we have that are the same.)

Elizabeth: microwaves, salvation :), horses -> Gypsy Vanners, birthdays, keys, a house, pencils, horse -> paint horses, church family, my brother   computers, zebras, salvation, sugar, paper, rootbeer, my crazy cat Gracie, good food *yum*, refrigerators, birthdays

(Psychiatrists probably could tell a lot about us from these also....)

Andrew: Lizzer, Gracie!, a house, money, story cubes, Momma's tablet, computers, a bed, a tv, computer games, coffee, church, dairies and meats, birthdays, food, penguins

On Andrew's leaf that said, "a tv", it was in all caps and close together and I thought it said "ATV" at first. We have a four-wheeler so I thought he was thankful for that, but thought it strange he was calling it an "ATV" since we use the term "four-wheeler" and then I realized what he meant....I also found it interesting he named Gracie, our indoor cat. They have a love-hate relationship going...

I love Wade and I named each other and our kids and I love that the kids each named each other ("Lizzer" and "my brother "). I also smile over the fact that we each named some sort of drink (coffee, hot chocolate, rootbeer).

We didn't share what we were writing as we wrote them. In fact it almost became a "secretive" thing although I found each member of the family reading others' throughout the month. Ha.

Taken with my phone so you can see the enormity of it:

While Thanksgiving was a month and a half away, I hope you enjoyed our thankful tree and remember, it doesn't have to be the month of November to think of all the things you have to be thankful.

We are so blessed!